

Thank you to everyone who participated in this week's #ChixWithTools Instagram series featuring a project completed with the use of a Nail Gun.
I don't know about you brave souls but the two power tools which I was the most afraid of were the table saw and the nail gun. I'm not sure if it was the noise or the size of these tools but the thought of using one by myself was daunting, if not impossible.
But something had to be done about our Master Bedroom.

I mean seriously, look at how sad Baloo is.
When we purchased this home, every single room needed work. There was not one room that we left the way it was. For some reason, our bedroom was one of the last rooms to be completed. Eventually, we decided we needed to do something about it.
We used our old master bedroom in our previous house as inspiration.

It was a brand new townhouse. Everything was clean and painted white but it was a little too clean and white. I loved the crisp, blank slate look so we decided to add a feature wall with wainscoting to add a little more detail and depth to the room without taking away from the airy vibe of the room.
This was our end result.

What you will need for this project is:
-Miter Saw
-Level
-Nail Gun (obvs) and Nails (Minimum 2 inch)
-Compressor
-Caulking Gun and Caulking
-Paint and Roller
-Trim (we bought a bundle of 10 pieces of 10 ft trim for $30 from Home Depot)
If you do not have these tools, you can go to your hardware store like Home Depot and rent one for the day.

That's it! You're ready to start!
Step 1: Turn your compressor on to "charge" your nail gun
Step 2: Map out how many panels you would like on your wall
Tip: A good way of doing this is to use some painters tape an make a mock up on your wall and make sure to measure the top trim and the bottom trim. The width of the top of your wall may be a few inches off from the width of the bottom of your wall. In my experience, dry wall is rarely symmetrical.

Step 3: Prep Your Canvas
We chose to leave room for some wallpaper at the top for some extra detail. As you can see from the master bedroom in our townhouse, the wallpaper is not necessary, This is totally a style preference.
Paint the wall. Yes, we painted directly on the wall. You can opt to install plywood panels on the wall before mounting the trim but we chose not to do that after calculating that it would save us about $100 and 2 hours to forgo this step.
If you would like to add the plywood panels, here is a good tutorial from the DIY Network- http://www.diynetwork.com/how-to/make-and-decorate/decorating/how-to-cut-stain-and-install-wainscoting-panels
We used high gloss paint and did a good three coats to ensure full coverage.

Step 4: Use your miter saw to cut all your pieces of trim while patiently waiting for your paint to dry- Fully Dry
Step 5: Hold the trim in place and press the nail gun in place and slowly pull the trigger while maintaining steady pressure on the trim.
Don't be alarmed, this is a powerful tool so you will probably feel a little of a kick back from the gun.
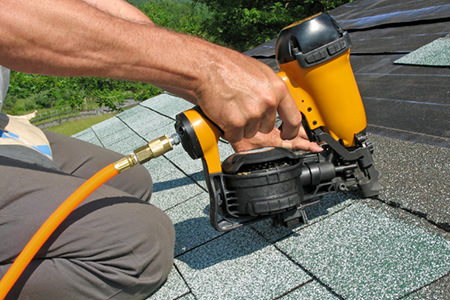
(image from google)
Step 6: Use a level and hold the other pieces of trim in place and nail them into the wall.

Step 7: Once all the pieces of trim have been nailed to the wall, fill in the gaps with the caulking.

(image from google)
Step 8: Wait patiently for the caulking to dry- Fully Dry
Step 9: Give the trim a couple coats of paint to match the wall

This project was so easy and so quick, I basically did it all over my house.
Here are other rooms where I used wainscoting to add that little extra something.


This looks amazing!! Love the panelling and think I want to try it in my house. Was size of trim did you use? Thank you so much!
ReplyDeleteThank you! The width of my trim was 3 inches. To be honest, we just used that because it was on sale. Any size will do =)
Delete